In the winter I have lots of big pockets to put my phone but with summer I have one layer with small pockets. So many times my phone falls out of my pocket and falls hard on the ground. Luckily I have a Blackberry that can handle the abuse. I thought to myself I have to solve this problem. So say goodbye to losing your keys, phone, money and other stuff.
This pouch is very handy; you can clip to your pants so its like having a pocket that fits an oversized cell phone, a pack of gum, lip gloss, and money. Clip your keys on to the carabiners (hiking clips) so if you’re like me you won’t lose your stuff out of your pockets anymore. I started taking quilting classes when I was pregnant for my son over 11 years ago. It got me out of the house and gave me something to keep me busy. I loved it! I haven’t done much sewing in the past couple years except this awesome pouch and hemming curtains. I have lots of ideas, fabric and tools so I hope to find time because it feels great to make your own bags, pillows, presents for others or whatever you want.
It takes only two hours to make this pouch and in the long run that’s less time looking for your lost items.
Material list
Standard sewing stuff
9″ square of fabric, new fabric or feel free to cut up some old clothes
9″ square piece of quilt batting
9″ square of cotton for the inside fabric
1″ 2 1/2” rectangle of the outer fabric
Two carabiner clips
Favorite colour thread
8″ zipper
Long piece of fabric for the strap. I used 38” long and 2 1/2” wide
A few safety pins
My favorite is jean fabric for the outside because it blends well with most of my clothes.
The size depends on the size of zipper you have. Go one inch bigger than the zipper. I learned that the hard way.
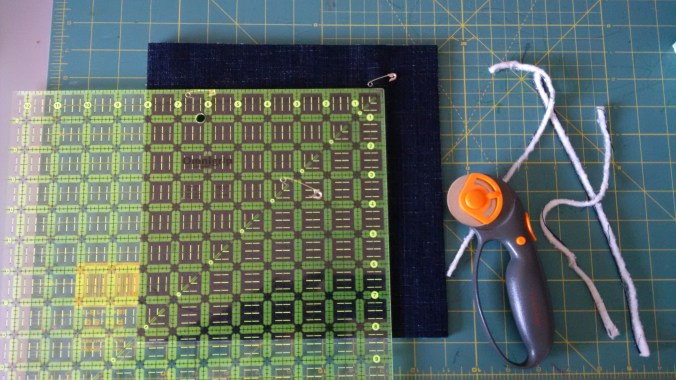
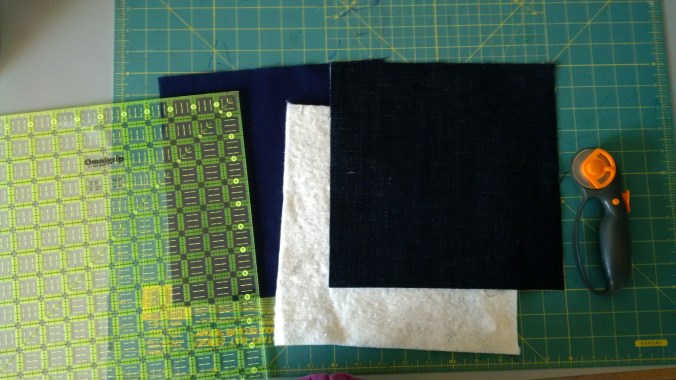
Measure and cut 9″ squares, outside, inside fabric and batting.
Secure all layers together with safety pins and trim edges if necessary.
Stitch edges using a zig zag or overcast stitch.
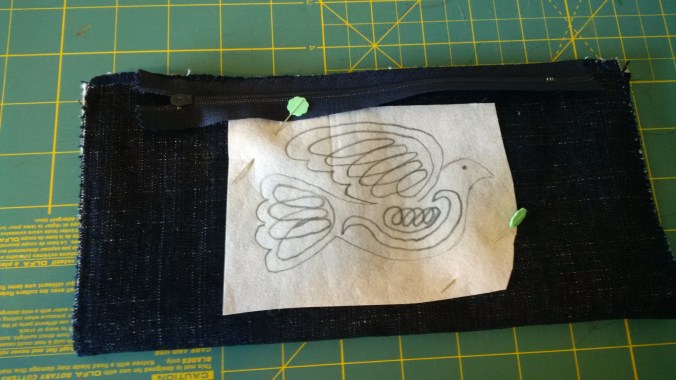
Pin fabric and zipper with right sides together. If you have an owner’s manual for your sewing machine, it’s nice to look to see which foot to use. Sew close to the zipper then zig zag rough edges.
Trace a logo of any image; I use my dove logo that my best friend, Debra-Lyn Ireland,
animalartist.ca helped me design. Pin under the zippered edge. Sew on top of the tracing paper and then peel off the paper. If you have an embroidered patch that would be nice too.
After one side of the zipper is sewn and the logo is done, fold right sides together and align other side of the zipper with the edge of the fabric. Sew close to the zipper, then zig zag rough edges.
Ok, hand sewing time. Hand sew the zippered edge to the inside fabric. Sewing the zipper edge to the inside fabric keeps the inside of the pouch neat.
Strap: You can skip this step if you have an old belt, guitar strap or an adjustable strap possibly from an old backpack or something. Customizing your own makes it original.
Cut 2 1/2″ long enough piece to wrap around your waist plus extra to use for your belt and carabiner clip loops. Mine was 38″ long. Safety pin a shoe lace or something similar to one end, tuck in and fold right sides together. Sew edge using a 1/4 inch seam, leaving an inch at each side. Pull the cord and wiggle the the fabric to go over the safety pin. You can iron press the strap flat or finger press which is my favorite method. Sew straight down each side of the pressed strap. At each end of the strap fold over an 1 1/2″ and fold the end in 1/2″ to sew on top. Sew back and forth many times to make it very secure.
Loops to attach carabiners:
Cut two 1″ X 2 1/2″ pieces of the outside fabric and finger press the edges inward and fold in half and press again. Move the needle on the sewing machine all the way to one side so that your fabric meets the drop feed teeth and sew once or twice.
Carefully place carabiner loops in position on sides near the top. Sew both side edges of your pouch and you are done.
Feel free to customize this pouch to your liking. Also you can cheat by adding loops to an already made pouch such as a pencil case or make-up bag. I would have liked to take more pictures of my pouch in use but I’m still wearing my parka. I found it difficult to take picture of my phone with the pouch because my phone is my camera.

The red pouch was my prototype which suits my needs so there wasn’t much to change. The blue pouch is for my best friend Lindsay, I started it in July and thought I would give it for her birthday in September but that pasted so I thought for Christmas but that pasted so now she gets it for being my best friend.
I am very thankful to have a few close friends who will always be their for me.
I feel so LUCKY!